Welcome to the GrapesIoT Platform
This is the entry point for everything related to the GrapesIoT platform: products, devices, data points, dashboards, MQTT connectivity, and the tools that connect them.
If you are new, read this post first. It gives you the mental model and points to the deeper guides in the series.
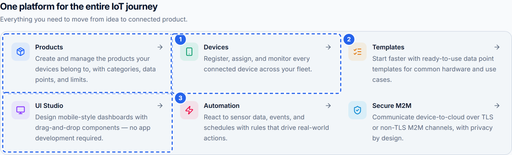
[image: 1794556122861-01-capabilities.png]
Products, devices, templates, dashboards, automation and secure M2M all live in one place.
What the platform does
GrapesIoT is built around one idea: describe your hardware once, then manage every unit of it as a device.
That description lives in a product. A product defines:
the identity of the thing you are building,
the data points it exposes (temperature, humidity, pump state, battery voltage, and so on),
the rules for each data point: type, direction, limits, units, and whether history is stored.
A device is one physical unit of that product. It inherits the product schema, gets its own credentials, and starts publishing data. The same product can back one prototype or ten thousand field units without changing the dashboard or the data model.
[image: 1794556123526-02-editions.png]
Community Edition is free for up to three devices. Higher editions add production tooling and support.
The four objects to learn first
Object
What it is
Why it matters
Product
A template for a class of device
Defines the data contract once
Data point
One named value in that contract
Becomes the key your device publishes
Device
One physical unit
Owns credentials and live state
UI screen
A published dashboard
Turns live values into something people can use
The relationships are simple:
Product
└── Data points (schema)
└── Device (one unit, own credentials)
└── Live values + history
└── UI Studio dashboard
Your first 15 minutes
Create a product. Give it a name, and add two or three data points. Start with a status value such as temp and a control value such as pump.
Create a device. Assign it to the product. Copy the client ID and password from the device card.
Publish one message. Connect to the broker and send a JSON payload to 1v0/<DEVICE_ID>/uplink.
Watch it arrive. Open the device monitor. The connection pill should move to Live and any bound widgets should update.
Build a screen. Open UI Studio, drop a widget on the canvas, bind it to a data point, and publish.
If you only have time for one step today, do step 3. Nothing in the platform feels real until a message from your hardware appears on screen.
Community Edition limits
The free Community Edition is intended for learning and prototyping. In the current app it allows:
up to 3 devices
up to 5 products
Limits can change. Check the edition comparison on the home page and your account page before you plan a production rollout. If you need more, the Developer Edition and Custom Deployment options are listed on the home page.
The rest of the series
How GrapesIoT Models Your Fleet: Products → Data Points → Devices — the object model in detail, with the mistakes that cause most first-week confusion.
Quickstart: Device → MQTT → Live Monitor — the exact topic, payload, credentials, and a runnable Node.js publisher.
Data Point Types Explained — how to choose between INT, BOOL, STR, JSON and RAW, and when to use JSON fields or enum values.
Your First Dashboard in UI Studio — palette, canvas, data binding, and publishing.
Before you post
When asking for help, include:
the product name and data point code,
the exact MQTT topic you published to (mask the device ID if you prefer),
the payload you sent,
what the monitor showed (connection state and value),
whether the data point is Status, Control, or Both.
Do not post device passwords, API tokens, or full connection credentials. Mask them before attaching screenshots.
Useful links
Platform: Open the platform
MQTT & Connectivity: Open MQTT & Connectivity
Protocol overview: https://embiq.grapesiot.com/protocol
 2
0 Votes1 Posts20 Views